Portal Accounts
You can provide access to the FireMapper Portal for any of your personnel that need to view and edit maps, or help manage your subscription.
A single Portal User (i.e. a Portal Account) may have multiple Portal Profiles, each within a different Group within the organisational hierarchy, and with their own permissions.
Portal Profiles have their permissions set through the following roles:
Viewer Profile - Read-only access to shared maps.
Editor Profile - Create, view and edit shared maps.
Publisher Profile - Can create, view and edit shared maps, configure Intra-agency sharing and create map Tokens.
Administrator Profile - Full access to the subscription, including creating/revoking Portal Profiles and FireMapper Licences.
Create Portal Account

Go to Portal Accounts page using the navigation sidebar.
Click the Create Portal Profile button to show the Create Portal Profile dialog.
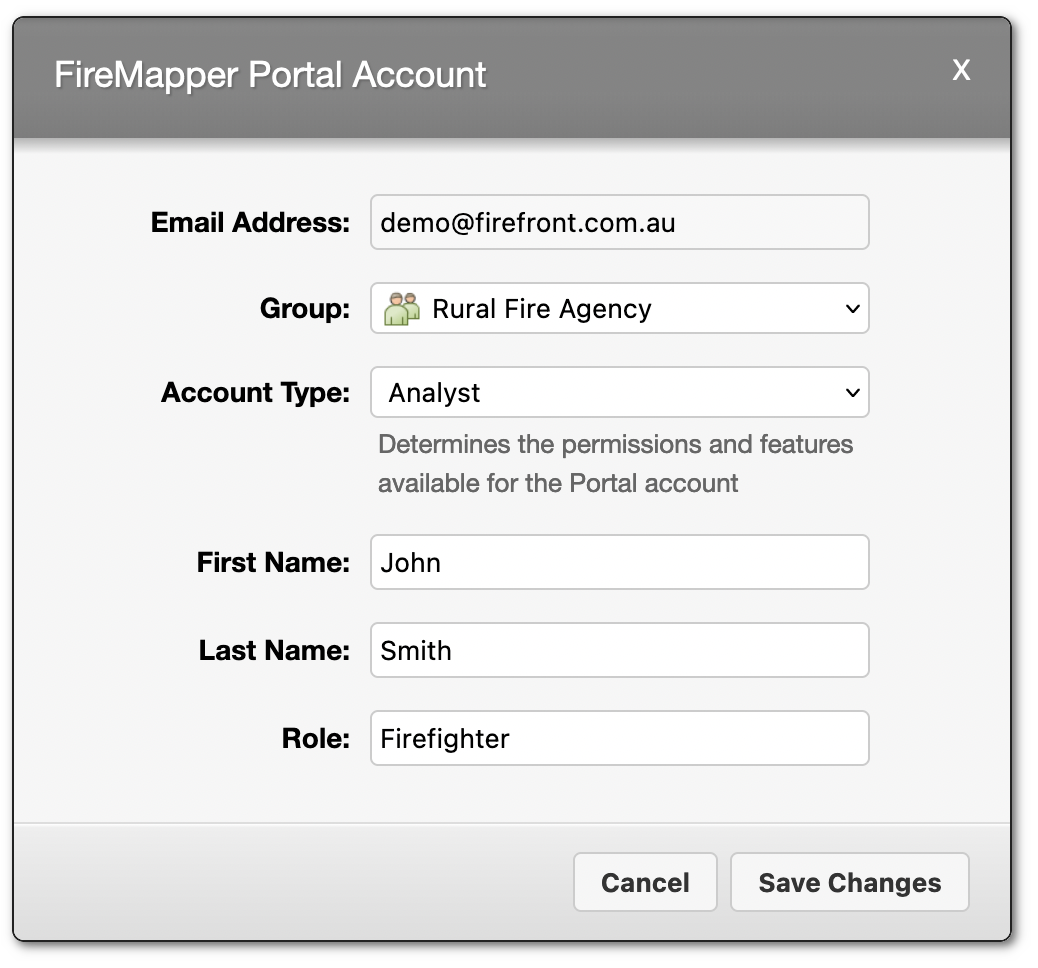
Select an Profile Type. This determines the features and permissions that the Profile will have access to in the FireMapper Portal.
You can provide additional information about the user such as First Name, Last Name and Role, which is used
to tag metadata onto shared map activity such as map edits and creation. These fields are optional.
Click Create Profile, and the email address will receive a Welcome to FireMapper Enterprise email.
Edit Portal Profile
Note
You can not change the email address for a Portal Account. If you need to change the email address, you will need to
create a new Account and then disable the old Account.
Note
You can only edit the first name, last name and role for your own account. You can not change the profile type or group
for your own account for security reasons.
Go to Portal Accounts page using the navigation sidebar.

Select the Portal Profile that you want to edit. You can click on the email address, first name, last name or role fields in the table to open the Edit Profile dialog.
Once you have made the required changes, click Save Changes at the bottom of the dialog to save the changes to the Portal Profile. If a user is currently logged in
with the modified Portal Profile, they will need to refresh their current webpage to see the new changes.
Disable Portal Profile
Go to Portal Accounts page using the navigation sidebar.
Click the Disable button on the right side of the Portal Profile that you want to disable. You can not disable your own FireMapper Portal Account.
Click Disable Profile to confirm that you want to disable the selected Portal Profile. Any users currently using that Portal Account will be logged out.