Adding/Editing

1. Locked Mode

When a Shared Map with features is opened, it will default to Locked Mode. In Locked Mode, no edits can be made.

../../../_images/locked_mode.png ../../../_images/locked_mode_feature.png
  • To edit the map, tap on the lock icon, then ‘Edit Map’.

    ../../../_images/locked_mode_enable_editing.png
  • To return to Locked Mode, leave the map and reopen it from the Shared Maps list.

    Note

    Minimising the FireMapper app (eg. for location tracking) does not Lock the map. It remains in Mapping Mode to ensure changes are tracked and saved.


2. Adding Features

The Symbology Toolbar contains all the symbology which can be added to the map. The toolbar only appears if (1) no features are selected and (2) you are sufficiently zoomed in, as you cannot edit the map at a statewide/country level.

../../../_images/symbology_toolbar.png

FireMapper contains bush firefighting symbols that are commonly used in Australia, USA & Canada with support for:

Points:
  1. Select a point type from the bottom toolbar.

    ../../../_images/point_types.png
  2. Tap and hold on the location you want to add your point, or use the pin drop to add the point to your GPS coordinates.

    ../../../_images/pin_drop.png
Lines:
  1. Move the map to the area where you want to draw as you can not move the map while drawing the line.

  2. Select a line type from the bottom toolbar.

    ../../../_images/line_types.png
  3. Draw a line on the map by dragging your finger across the screen, or by using the record_white record button.

  4. Line distance will appear at the top of the map. If you close the shape, the enclosed area will also appear for the line.

    ../../../_images/draw_line.png
  5. Tap the tick tick button in the bottom left corner to save, or the cancel_draw cross to cancel.

Areas:
  1. Move the map to the area where you want to draw as you can not move the map while drawing the area.

  2. Select an area type from the bottom toolbar. You can scroll left to right to access different feature types.

    ../../../_images/area_types.png
  3. Drag your finger to trace the perimeter of the area on the map. The area will auto-close when you either cut your drawn perimeter with your finger or when you lift your finger off the screen.

  4. The perimeter and area will be displayed at the top of the screen as you draw the area.

  5. Tap the tick tick button in the bottom left corner to save, or the cancel_draw cross to cancel.


3. Editing Features

Select on the feature you want to edit. The Feature Toolbar will appear at the bottom of the screen. The buttons that are available in the bar will depend on the feature type.

../../../_images/featurebar_s.jpeg

delete Delete: Deletes the selected feature.
Note

Deleted features can be restored from the Map Properties Page.

edit Edit: This functionality exists for LINES or AREAS only.

  • Lines: Either end of the line can be moved. Tracing a line intersecting the existing line 2 times will replace that section of the line with your new geometry.

    ../../../_images/edit_line.png
  • Areas: Tracing a line intersecting the existing area 2 times will replace that section of the area with your new geometry. You can cut or add area.
    • Cut: Removes the selected area from the existing area.

      before_cut_area after_cut_area

    • Add: Adds the selected area to the existing area.

      before_add_area after_add_area

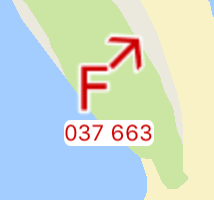
flip Flip: This functionality exists for ASYMMETRICAL LINES only (eg. control lines, backburns).
before_flip after_flip

rotate Rotate: This functionality exists for ROTATIONAL POINTS only (eg. fire/wind direction).

Rotates the selected point by 45 degrees.
before_rotate after_rotate