Recording Data
This page describes the process of recording data with InFlight and having it automatically display in FireMapper. The types of
data that are shareable include the drone’s location, photos taken, and any marked locations or flight paths.
Note
Please ensure that FireMapper is successfully paired with InFlight before proceeding.
Uploading Photos from the Drone
Any photos taken with the drone while connected to FireMapper will automatically be uploaded to
FireMapper. Simply take a photo as you normally would either with the photo button on the pilot screen,
or the hardware photo button.
Thermal Image Colour Palette
DJI has a variety of thermal image colour palettes. The ability to select the colour palette within
InFlight will be supported in the future, but in the meantime, the DJI Pilot app can be used to select
the desired colour palette. Then InFlight will use the colour palette you selected.
Marking Locations
Inside the Pilot View, there are buttons to select a point type and mark a location. Use of the camera
target is only available when the camera pitch angle is greater than 10 degrees below the horizontal
due to increasing inaccuracies outside of this range. Note that the camera target is calculated based
on a flat ground assumption and may have low accuracy.
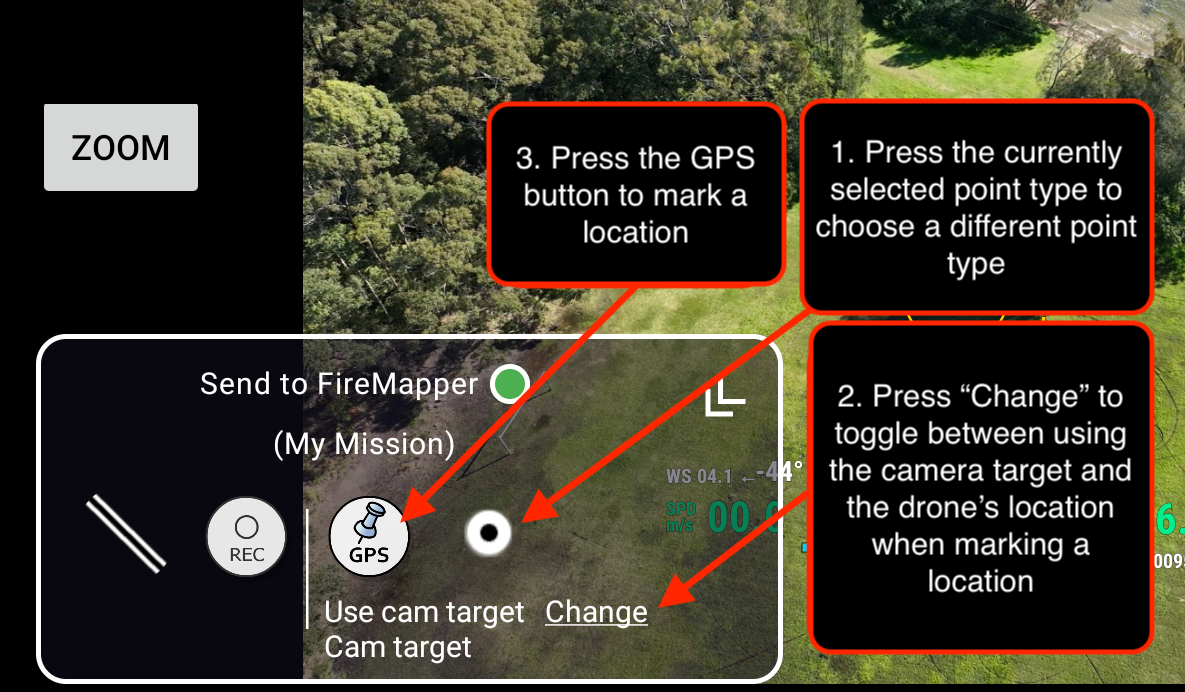
Select a point type (By pressing the currently selected point type icon to the right of the GPS pin
button) and selecting a point type.
Decide whether to mark the drone’s location or the camera (or laser) target. The “change” button will
allow you to switch between using the camera / laser target and drone location.
Press the “GPS” pin button to mark the location.
Recording Flight Paths

Select the line type you want to use by pressing the line icon to the left of the “REC” button and
select your line type
Press the “REC” button
Fly the path you want to record
When finished press the stop record button